Upload a session
The first step is always the same: export the file from your data logger and upload it to ApexCoach.
Formats it accepts
ApexCoach reads the CSV/TSV exported by the most common analysis programs in karting. You don't need to convert anything — upload the file exactly as it comes out of the program. Compatible data loggers: AiM, Unipro, Alfano and RaceChrono.
RaceStudio 3 / AiM (.csv)
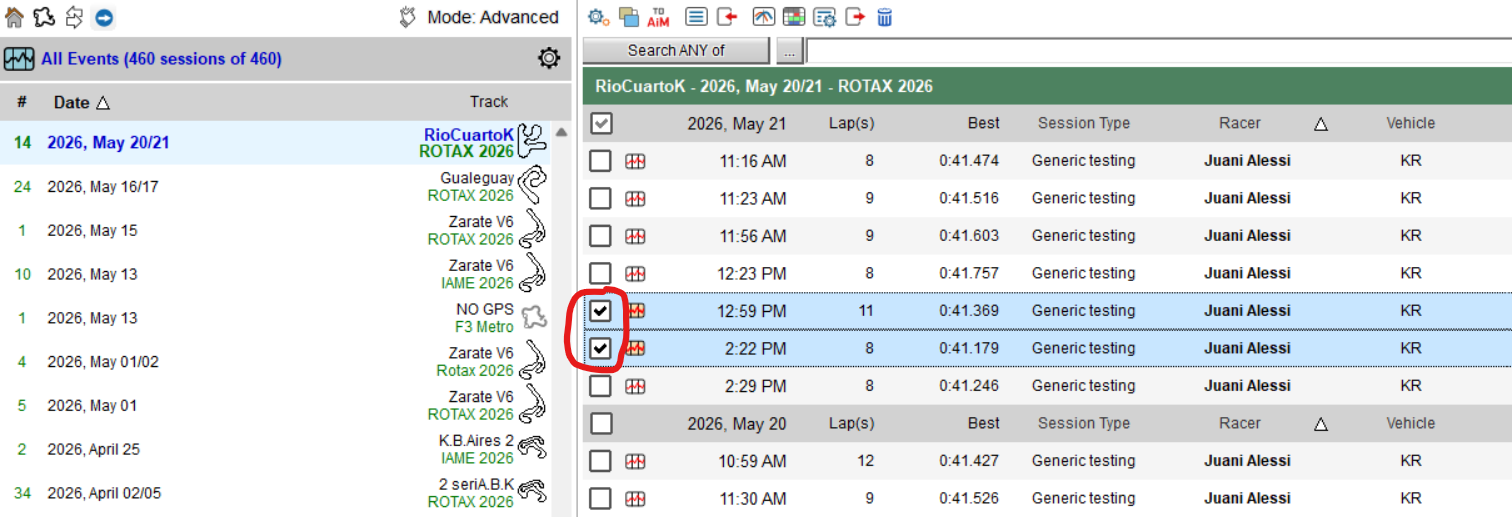
Step 1. In the events and sessions tab, check the runs you want to export (you can select several at once).
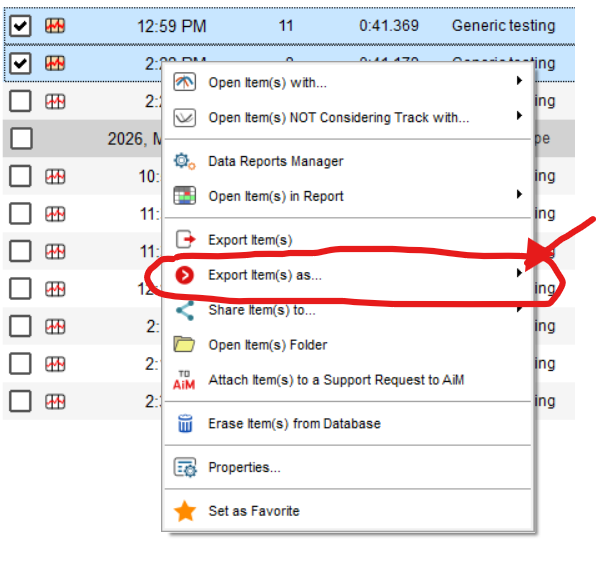
Step 2. Right-click on any of the selected runs to open the menu, and hover over "Export item(s) as…".
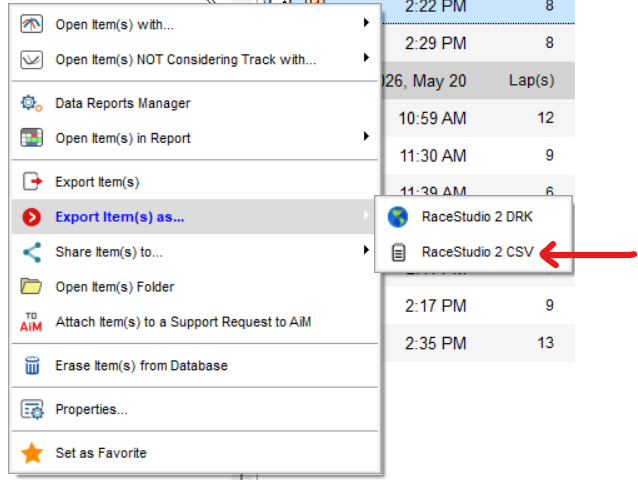
Step 3. Click "RaceStudio 2 CSV".
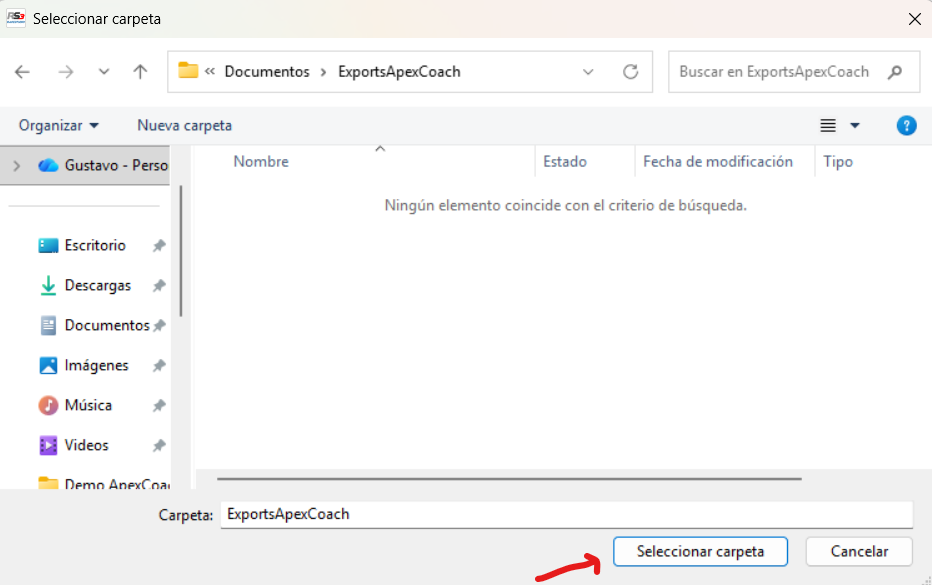
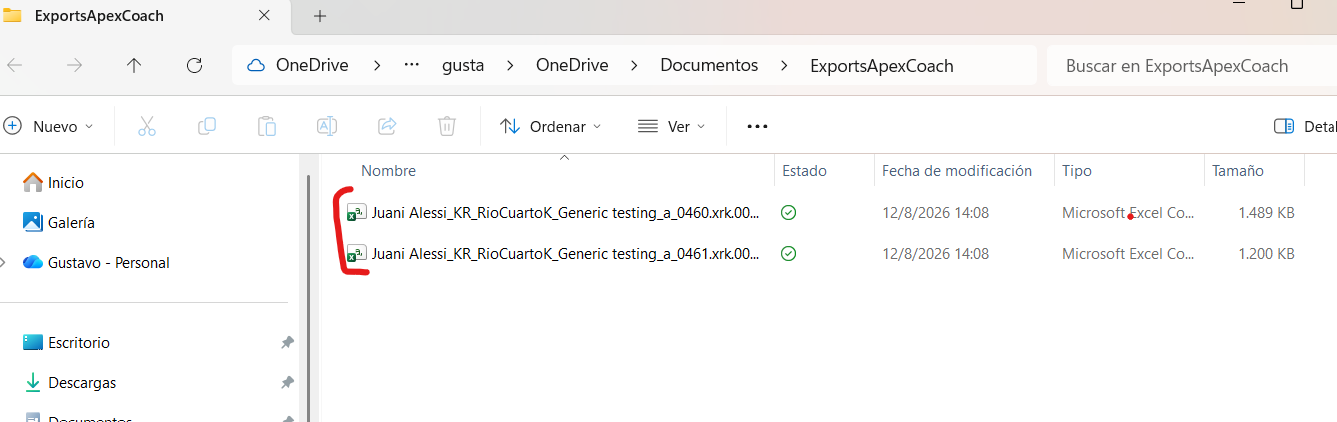
Step 4. Windows Explorer opens so you can choose the destination folder (for example Documents/ExportsApexCoach). Click "Select folder".
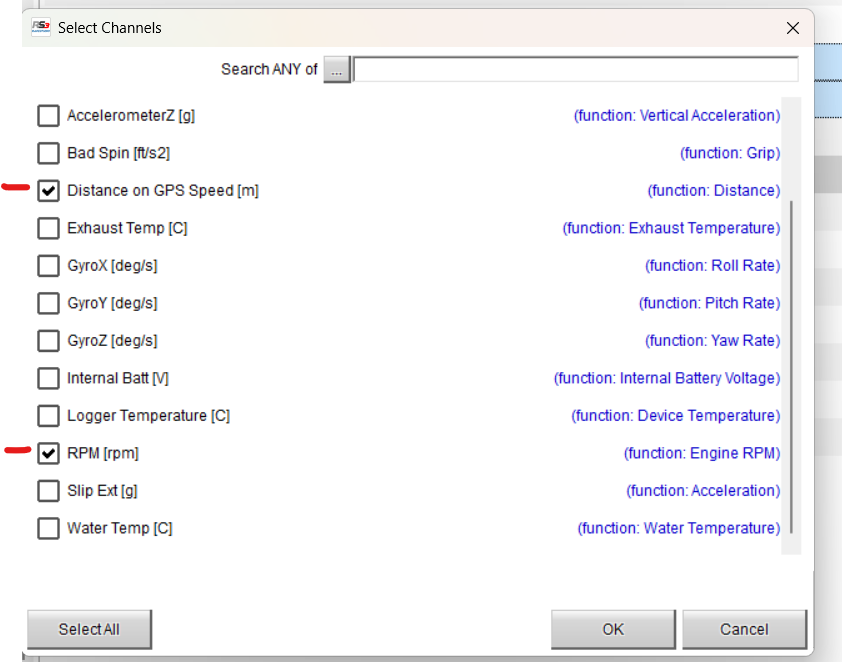
Step 5. The channels window appears. The simplest option is "Select all" — the app only uses what it needs and ignores the rest. At a minimum, keep Distance on GPS Speed, RPM and the lateral and longitudinal acceleration channels (AccelerometerX/Y) checked. Then click OK.
Step 6. Done: the selected sessions are saved as .csv in that folder. Those files are what you upload to ApexCoach, untouched.
Unipro Analyzer (.tsv)
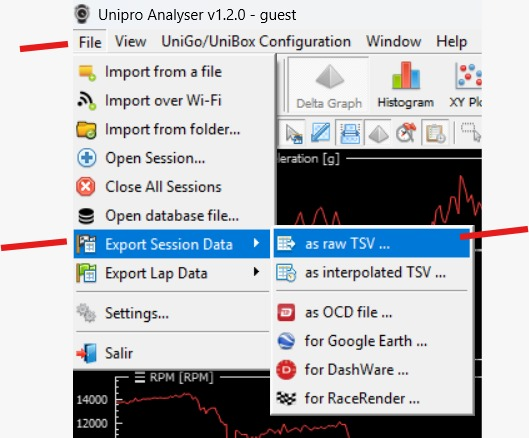
Step 1. Open your session in Unipro Analyser and go to File → "Export Session Data" → "as raw TSV". Unipro saves with a tab separator (.tsv) instead of a comma.
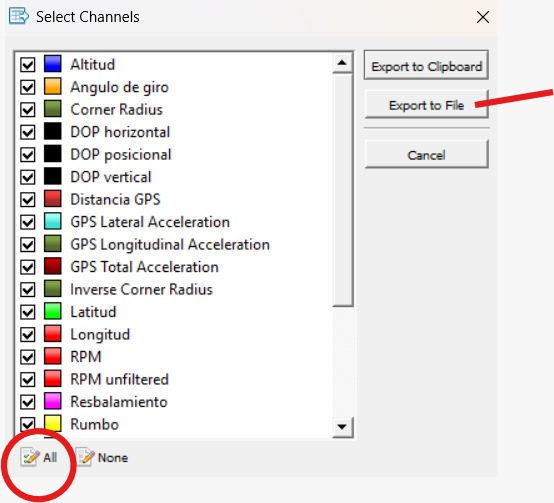
Step 2. The "Select Channels" window opens: keep them all checked ("All" button) and click "Export to File".
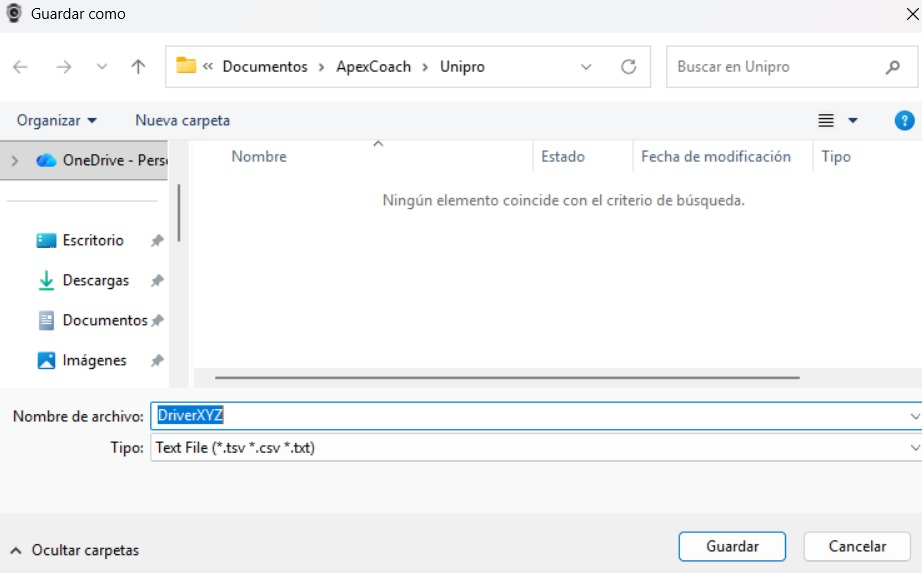
Step 3. Choose the folder, give it a name and save. Upload that .tsv as-is: the app detects it on its own and interpolates the channels by itself. No need to flag anything manually.
Alfano (.zip)
- Connect your Alfano data logger to your computer and download the session's .zip file directly from the device.
- Upload that
.zipto ApexCoach as-is — no need to unzip it, the app opens it on its own.
RaceChrono (.csv)
- From the RaceChrono app (or RaceChrono Viewer on your computer), open the session.
- Export in standard CSV format.
- That
.csvis what you upload to ApexCoach.
Upload a file
In the Analysis tab, you'll see a drop zone for the file. There are two ways to upload it:
- Drag and drop the file straight from your downloads folder
- Click the upload zone and pick it from the file browser
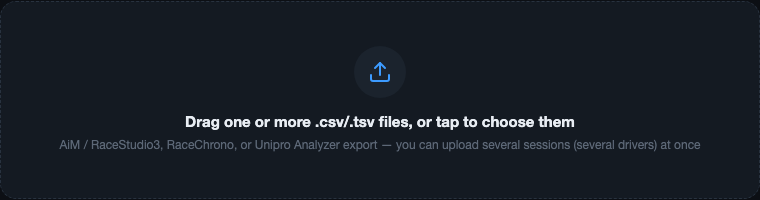
Upload is instant — there's no server wait, all the parsing happens in your browser.
Upload several files together (batch)
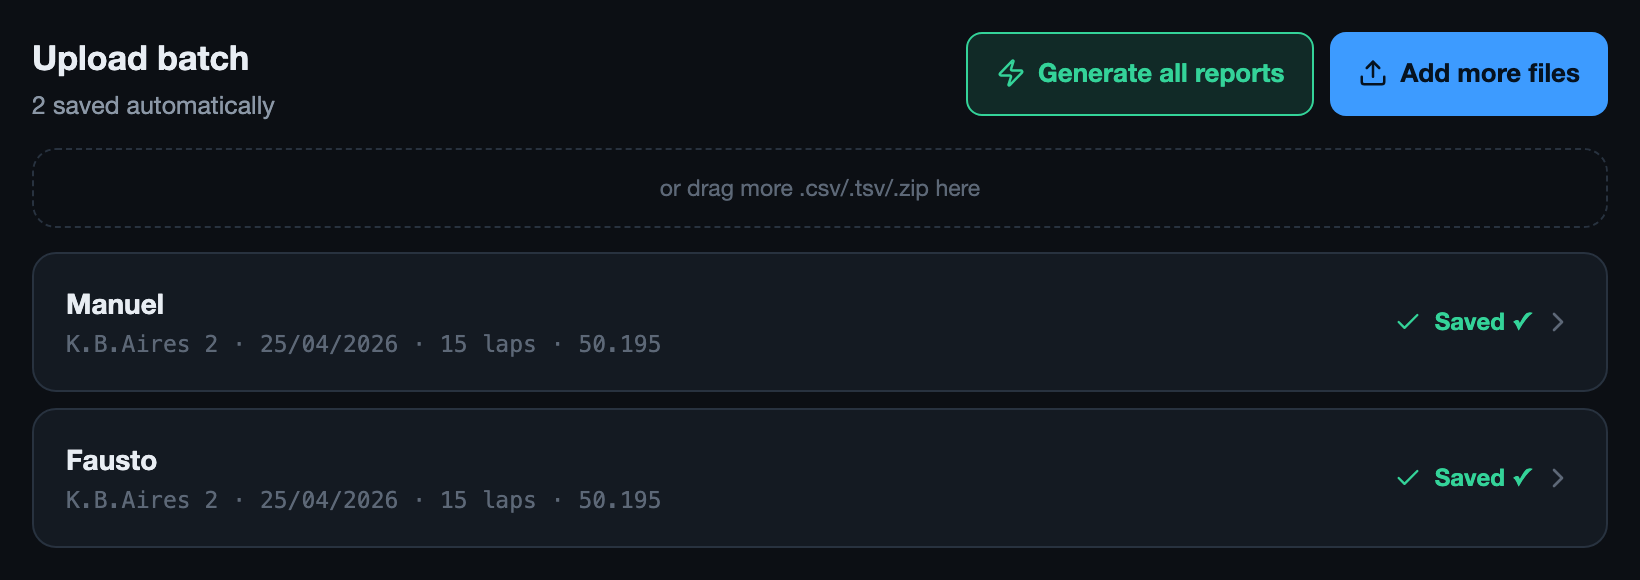
If you have a track day with several riders, you can upload every file from that session at once instead of repeating the process one by one. The app automatically identifies which rider each file belongs to (by the name configured on the data logger) and builds the sessions separately.
What the app does automatically on upload
As soon as you drop the file, without you doing anything else, ApexCoach:
- Detects every lap from the file's timestamp/beacon marks
- Filters out in/out laps so they don't clutter the comparison
- Builds the track map from GPS (if the file has it)
- Detects corners automatically — by GPS radius of curvature if your logger has that channel (more accurate on fast or very open corners), or by lateral load (where lateral acceleration goes over 0.7g) if it doesn't — no need to mark them by hand
- Saves the session under the Drivers tab so it stays in the history
All of this takes a couple of seconds even on long sessions. If your file has no GPS, the app still works for comparing laps and channels — the only things you'll miss are the map, Replay, and the friction circle.
Common upload errors
| Message | What it means |
|---|---|
| We couldn't find the channel header | The file isn't a valid RaceStudio3/Unipro/Alfano/RaceChrono export, or it got corrupted when it was saved |
| No lap marks | The file has no lap beacon — check that the logger detected the start/finish point on track |
| Channels aren't interpolated | The export has gaps between readings — re-export with interpolation turned on |
If a file gives you an error that isn't on this list, send it to your coach or admin to look into.